How to: Implement Crypto Checkout (API)
How to: Implement Crypto Checkout (API)
Use this guide to allow users to make crypto payments with supported tokens/chains from a few simple API calls.
This page is for advanced / cryptocurrency-native companies. If that’s not you, head back to the Quickstart for the standard flows.
1. Display Supported Tokens and Chains
Upon a user initiating a checkout, you can display which tokens they are able to make payments with by calling the Get Supported Tokens endpoint:
If you see an error response for this endpoint, contact your Coinflow integrations contact to see if you can get Crypto payments enabled on your account.
2. Initiate Payment
Once the user enters which token and chain they will be making their payment on, you can pass Coinflow the user’s wallet, blockchain, and the payment amount in order to initiate a payment job.
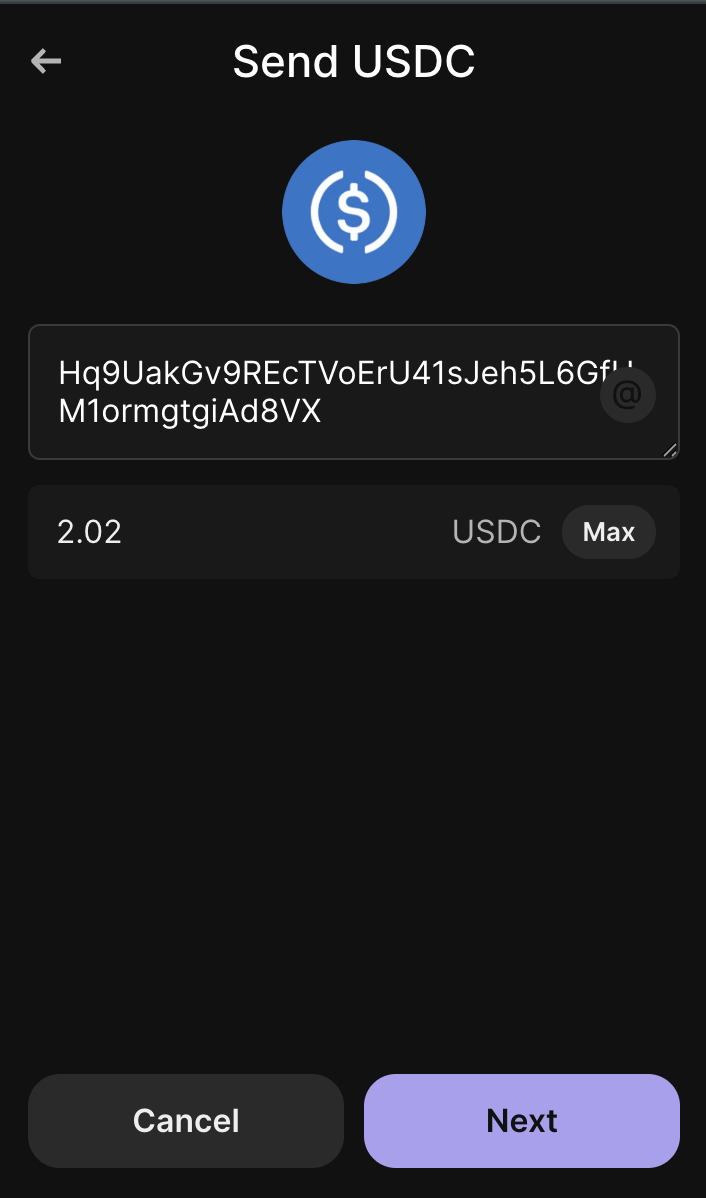
3. Send Funds
The payer is then responsible for navigating to their own crypto wallet to send the paymentAmount + commission to the depositAddress.
Below is an example showing how USDC was sent on solana devnet through a payer’s wallet connector. In this example, we use Phantom but users can pay from anywhere as long as they have tokens available in a wallet. If you are testing sending non-stable tokens, feel free to use Google’s faucet to send the needed token.
After a successful response, the payment should show up in your merchant dashboard as “Initiated”. From here, the user will take the deposit address given in the success response, and send the displayed payment amount via their crypto wallet.
Refunds
If the user sends the correct amount/token/chain associated with the initiated payment, then this should instantly go through as “Settled”. If the user paid with the correct token/chain, but overpaid, we will still settle this payment but will refund the user the overpaid amount. If underpaid or on incorrect token/chain, we will automatically initiate a refund for this payment.